
The girls love collecting pretty leaves while we’re out walking. I have to admit, there is something beautiful—and fleeting—about the natural world during autumn. So I started thinking about ways we could preserve some of that beauty. (Or at least bring the leaves home to enjoy without going crazy when they fall apart and make a big mess.) I found this idea for a fall vase on Pinterest.
Supplies needed (affiliate links):
- assorted fall leaves
- vases, glasses or jars
- Mod Podge
- foam brushes
- clear acrylic finish spray
- ribbon (optional)
There’s a reason I test all our crafts before sharing them on the blog with you. This project was almost a fail.
For our first attempt, I laid the leaves out to dry flat on my desk between a few sheets of paper. When we tried to Mod Podge them to the vases, the leaves were too stiff. They wouldn’t curve around the vases or stick to the glass, leaving the girls very frustrated. We ended up throwing out those leaves, washing the Mod Podge off the vases, and going for a walk to get new leaves.
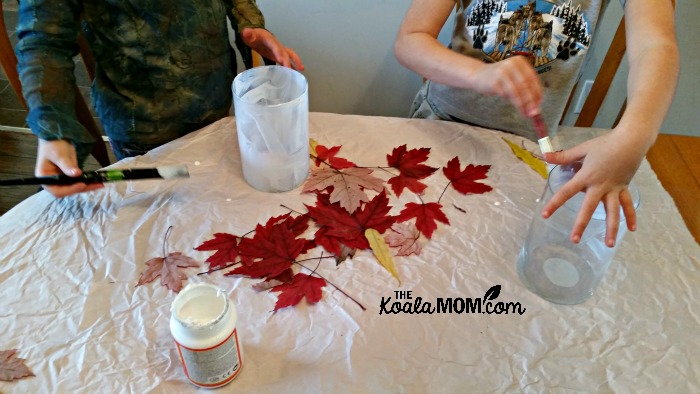
For our second attempt, I made sure that we choose smaller, thinner leaves rather than big, thick leaves. Colour doesn’t matter much; all the leaves on the vases have turned the same colour now that the Mod Podge is dry. Just pick a variety of shapes (if you can).
We brought the leaves home and all I did was dry them off before the girls used them in their craft. They slathered Mod Podge on their vases, using paint brushes. Then they stuck the leaves to the vases and applied more Mod Podge over the leaves. We let the first layer of leaves dry overnight.
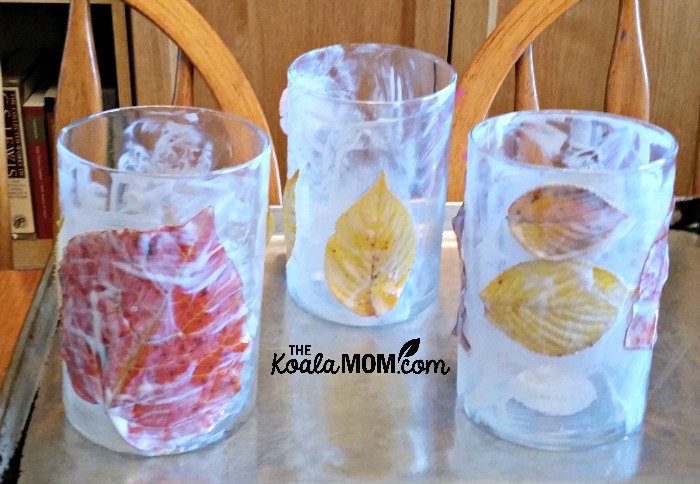
The next day, the girls applied a second layer of Mod Podge and more leaves and Mod Podge. Jade had as much fun doing this as Sunshine and Lily did; she can easily wield a paint brush. I just had to make sure she didn’t put too much Mod Podge on her vase.
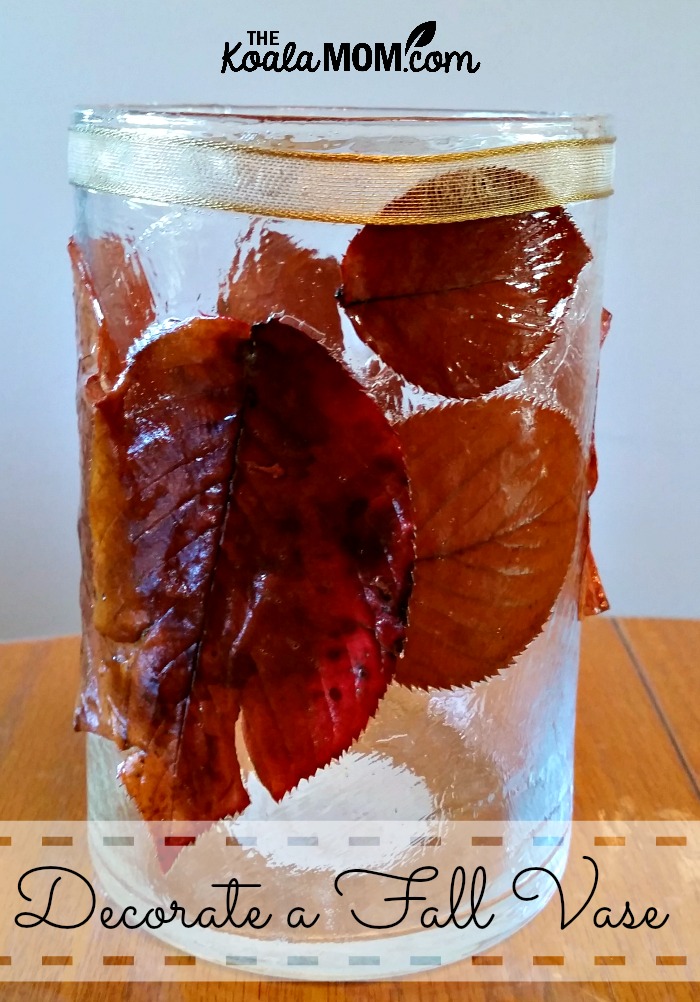
We also put a gold ribbon around the top edge of the vases. The gold complemented the leaves nicely and gave a more finished look to the vases. However, like the leaves, the end of the ribbon didn’t want to stick originally (it had a wire in it so was a bit stiffer), so I ended up putting a paper clip over it to hold it in place at the top of the vase until the Mod Podge dried.
Once the Mod Podge is dry, it makes a pretty textured pattern on the glass. Some of the leaves still stuck out a bit from the vases, but they have enough Mod Podge on them that I think they’ll be okay. To finish the vases, apply a layer of varnish (spray-on is easiest) to help seal the leaves and Mod Podge.
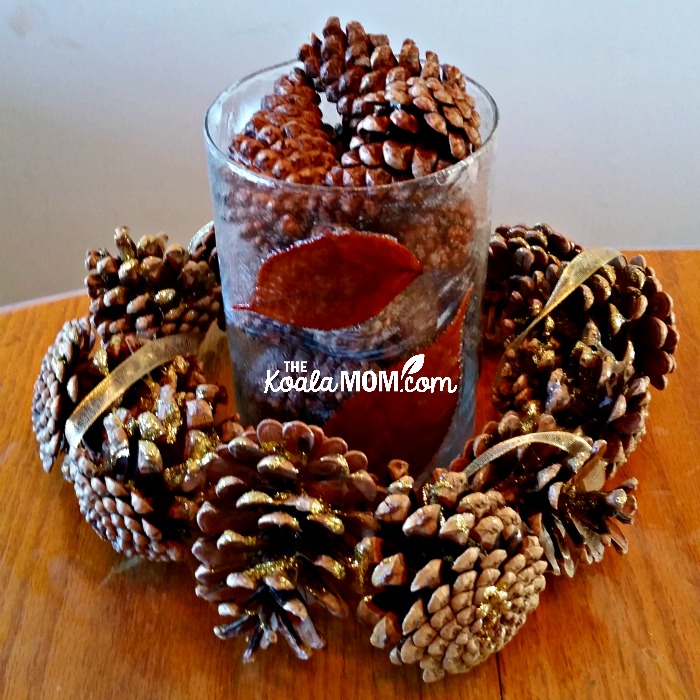
Now the vases are ready to display or give away! Depending on the size of glass or jar you used for this craft, you could use it to hold flowers, a candle, or other pretty things. We filled one vase with scented pine cones to create a gorgeous fall centre piece for the table. I also made a pine cone wreath to put around it.
Cost: $5
Difficulty: easy (suitable for ages 2+ with help)
2 Comments
I feel silly asking but what exactly is mod podge? Im guessing it is some kind of glue? My craft level is kid level and I love that this is a pretty simple craft to do. Plus the leaves on the ground and in the tree right now are so amazing with their gorgeous colours!
Yes, mod podge is a type of glue. You could probably also just use white glue, thinned with water for this craft. A friend also told me that she used cloth or fake leaves instead of real leaves, as we had troubles with our real leaves – they didn’t stay flat. If you drop by a craft store, they’ll be able to help you find mod podge and leaves. 🙂