
For the past four or five years, I’ve made a photo calendar for ourselves and our relatives. The girls love flipping the page each month and seeing whose picture is featured on the new month. For our relatives, it’s a fun way to give them big photos of the girls to display on their walls. This year, I was super excited to create a Minted photo calendar. Here’s my tips for creating an annual photo calendar for your family.
This is a sponsored post and contains affiliate links; all opinions expressed are my own.
1. Choose your design.
I recommend browsing Minted.com and choosing your photo calendar design first. This way, you know how many pictures you need to choose and what layout the pictures should be. I’ve always picked just one landscape photo per month, so I know I need 13 pictures (including the cover page). You can also do a multi-photo spread for each month.
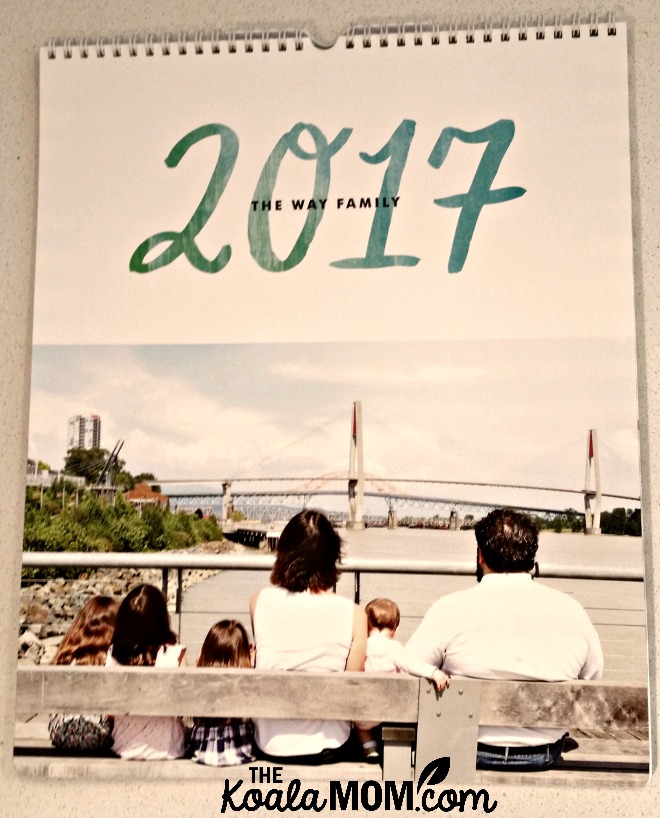
I’ve used Minted.com to make Jade’s birth announcements and our Christmas cards last year. I love browsing their designs! There are so many unique, gorgeous designs for every sort of project. It’s hard to pick just one! Plus, I get so many ideas for my own projects! For our photo calendar this year, I finally chose Painted Script Grand. The flowing script for the year and the months caught my eye.
2. Choose your photos.
This is the fun part. I have all our photos on the computer, organized in folders by month. I create a new folder in my 2016 folder, labeled “Calendar.” Then I browse through all the photos for the year. It’s fun to relive memories and see what we’ve done over the year! As I find photos that I think would fit the calendar, I copy / paste them in the Calendar folder.
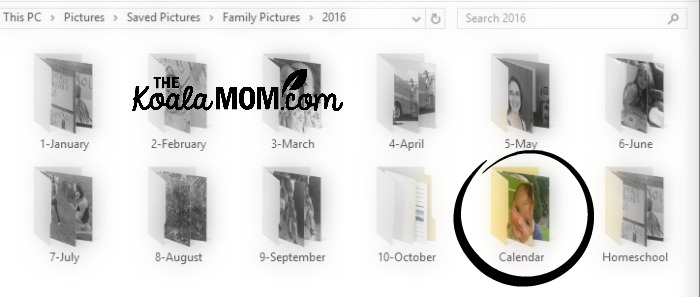
Once I’ve gone through the entire year and picked pictures, I review the pictures in the Calendar folder. I usually have over 20 pictures here, and have to narrow them down to 13. This is where I ask my husband for his opinion. We each have our own favourite photos of the girls from the year. Some are obvious choices; others are harder. It is easier to see which ones are more suitable for the calendar when they are all side-by-side.
As we decide which photos we are going to use in the calendar, we usually assign them to a month. For example, we’ll label the photos 1-January, 2-February, etc, so that they fall into order in the folder. This gives us a preview of the calendar before we upload it.
We also tend to assign seasonal photos to the appropriate months; for example, we’ll put pictures of the girls in scarves in winter months and at the beach in July or August.
3. Upload them and start designing your calendar.
Once you’ve narrowed your selection down to the pictures you want to use, it’s time to go to Minted. Open the design you like, then upload your photos. Arrange them in the months. You can adjust each photo for how it is cropped and zoomed in. Minted will warn you here if a photo isn’t high resolution and may print with poor quality.
Depending on your design, you may want to rearrange your photos more here. For example, when I uploaded our photos, I noticed that the beautiful scrolling script covered some faces in the photos I’d chosen. I rearranged the photos I’d picked for a couple months to make them fit better with the design.
4. Personalize calendar dates.
Once all the photos are perfect, take a look at the calendar itself. This is your calendar, so you can pick what dates appear on it! I usually add the girls’ birthdays to our calendars. I also take out American holidays and make sure all Canadian holidays are included. If you know other details ahead of time, like reunions or special holidays, you can add them to the calendar here too.
5. Order your photo calendar and hang it on the wall!
When everything is perfect, place your order and wait for your photo calendar to arrive! Minted usually ships items very quickly. I received our calendars about a week after I ordered them. (Perfect if you’re doing this last minute, like I usually do…)
The girls were so excited to see what photos I’d picked for this year. I can’t wait to hang our beautiful new calendars on the wall—and share them with Grandma and Grandpa!
Tip: make your calendars and holiday cards at the same time, while you’ve got all the photos picked and uploaded!

I received our photo calendars in exchange for this post; all opinions expressed are my own. This post contains affiliate links; as an Amazon Associate, I earn from qualifying purchases. Our calendar cover photo was taken by Memotime Photography in New Westminster, BC.
No Responses Yet