
Much of our furniture has come to us second-hand or very cheap. A little bit of work can transform an old piece of furniture in something bright and new. This is the story of my DIY upscaled bookshelf.
When we lived back in university family housing, there was an area by the garbage known as the “free pile.” People moved in and out of the townhouses frequently. They often left stuff behind that they didn’t want to pack, for either the garbage men to haul off or someone else to use.
I had a love/hate relationship with that pile. We got some great stuff there, like our computer speakers, a floor lamp, and the footstool for our glide rocker. Other times, my husband would bring home something and I’d say, “Please take it back!”
The free pile was where we found a battered old brown bookshelf that we stashed in our “pantry” (aka hot water closet). Because it just had canned goods in it, I didn’t care that the bookshelf was a bit stained and scratched (after I’d washed it down well).
When we moved, I was thinking about leaving it behind (either in the townhouse or back in the free pile). Then a friend of mine mentioned chalk paint. She said it could miraculously transform any piece of furniture into something new. And I looked at the girls’ bedroom and thought about that shelf…
So we moved the shelf to our new place for me to turn into a DIY upscaled bookshelf. My friend lent me all her chalk painting supplies and gave me a few tips (use a dropcloth, not newspaper, as chalk paint sticks to paper; use only a little bit at a time, as it dries quickly). One afternoon, while the girls were busy stickering, I spread out some bubble wrap (in lieu of a sheet) and hauled the shelf over to start painting.
You can see that there’s water damage or other stains on both shelves, green and purple marks on the top, and one shelf is missing completely:
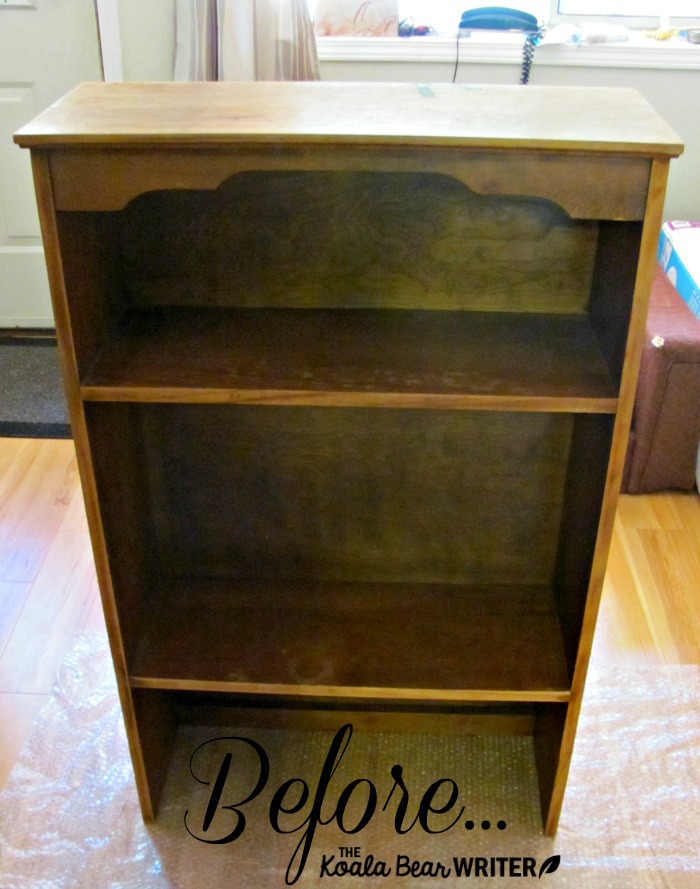
It also rocked, which Sunshine discovered when she was playing close to it and almost pulled it over on herself (thankfully it was inside a closet, so it just bumped into the door and she was fine). Looking at the bottom, I realized that the reason it was rocking was that someone had stapled two narrow strips of wood to the bottom edges of both sides of the shelf. The fronts and backs of these strips of wood had worn away, creating a rounded, rocking bottom. I used a hammer to pry those strips off and the shelf sat square and solid on the floor.
So I began painting. Because it was a dark shelf, I soon realized I’d need two coats of paint. The first looked like this:
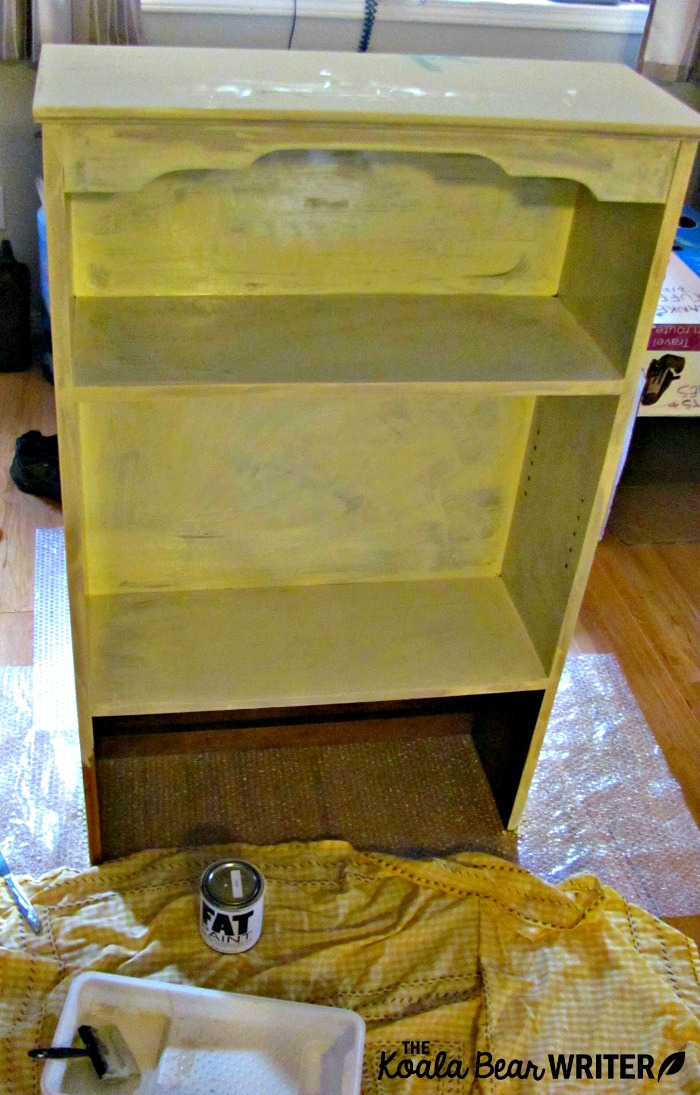
I gave that a couple hours to dry and then, when the girls were once again busy, I put on a second coat. It was so fun to see the bookshelf start to transform. Usually I’m a fan of wood (my dad loves wood and our house was full of his hand-built wood furniture, like my solid oak desk). In this case, my DIY upscaled bookshelf looked so much better in white paint:
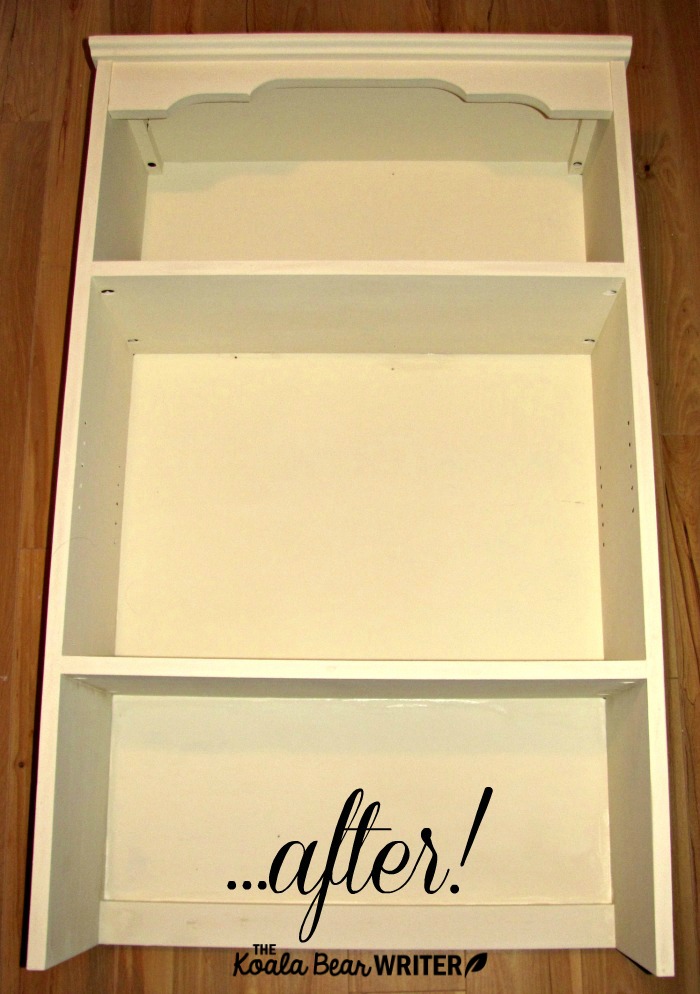
It made me think of my folk art painting days. I half considered adding a few flowers and other flourishes on that top cornice piece. Then I decided that (a) I was probably way out of practice and (b) I didn’t have time anyway and (c) I liked the simple paint.
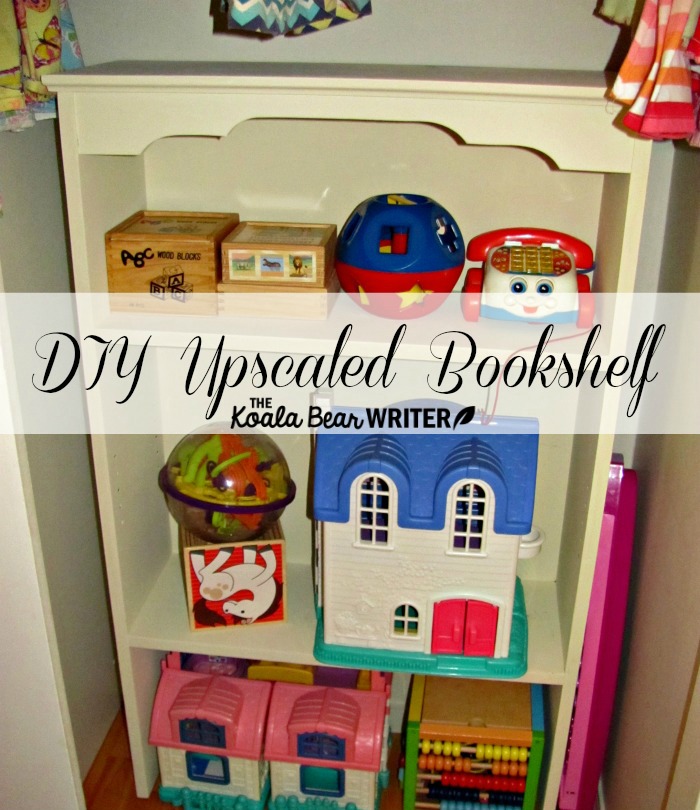
My DIY upscaled bookshelf is now stashed in the closet in the girls’ room (although after repainting it, I’m almost sorry that’s the only place we have space for it, because it’s so pretty!), giving them extra space to store their toys. At least, that’s the plan. I’m trying to encourage a regular clean-up routine every evening and to enforce the idea of “everything in its place.” So hopefully this bookshelf will help motivate that!
Have you ever repainted old furniture or used chalk paint for other DIY projects?
7 Comments
This looks awesome. I’ve actually been looking into doing this. We’ll probably be moving far away and I’d rather leave most of our furniture behind, find old antiques and refurbish them,
I’ve never repainted anything but I need to do my interior doors (and already have the paint) and would like to do my kitchen cupboards. I guess this is proof that I can! I would have lived at the free pile.
Besos, Sarah
Blogger at Journeys of The Zoo
what a great idea!! i think it’s time to get started on this diy too!! i’ve got many books
wow, that’s looks so great! I’m not very good at DIY but I love seeing what others can create!
I’m not a big DIY-er, I’m more likely to go to Ikea or Home Depot and pick up a bookshelf, but I agree that it’s great to have a “home” for each toy. Makes clean-up and even play so much easier!
This is seriously fantastic! Way to go on your creation! It really looks lovely. I love the idea of a bookshelf that is used to house children’s toys. My two share a bedroom and we have a bookcase that has a top shelf of books and the bottom 2 are rotating toys. I saw this idea somewhere in the inter web and it works so perfectly!
Way to go! It looks great! I so dont have the patience for that haha.